Residual Stress

Residual stress can cause premature failures in structures and equipment and is a significant contributor in crack growth calculations. It is created by a variety of sources including welding (thermal), fabrication (force fit), manufacturing (cold forming), and structural loads (thermal ratcheting, pressure overload, and excessive force). Corrosive environments are particularly detrimental to metals in tension. In some situations, heat-treating reduces the impact of residual stress, but these procedures often are neither practical nor specified.
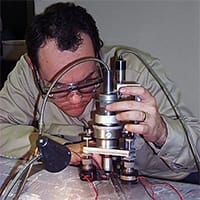
Stress Engineering Services can measure residual or ambient stress using strain gages with the Blind Hole Drilling Method (ASTM E-837). This technique measures deformation as a small hole is drilled into the surface. As the new hole expands or contracts in response to the local stresses, the surface complies with the deformation. Principal stress is calculated from the measurements of a three-element strain gage oriented radially around the hole. The tiny-drilled hole is typically within the corrosion allowance and can be easily removed by blend grinding.
Residual Stress Process
- Measurements can be made in our test lab, on client site, or in the field.
- Real-time evaluation reduces the likelihood that decisions are based on faulty measurements.
- This provides greater confidence in results during a turnaround inspection in a refinery.
- These procedures are often used to evaluate stress relief procedures at welds or in forgings and castings prior to machining.


