Unlocking the Mystery of Hard Spots on Vintage Pipes

By: Sri Chimbli, PE, AWS CWEng/CWI
Over the years, vintage pipes have often been subject to unexpected ruptures, a phenomenon attributed to the presence of ‘hard spots’. These are areas of heightened hardness on the outside surface, exceeding 327 HB (35 HRC). The ability to accurately identify these hard spots through current inline inspection methods has been a topic of ongoing debate. The creation of hard spots on pipes in a controlled environment can serve as a valuable tool for validating and calibrating existing inspection equipment.
Stress Engineering Services (SES) has taken the lead in this field, conducting extensive laboratory tests, and successfully creating a 2-inch diameter hard spot on an 18-inch diameter grade X52 vintage pipe with a wall thickness of 0.320-inch. The vintage pipe, with a specified chemistry of 0.30 max carbon, 0.85 – 1.25 manganese, 0.04 max phosphorus, and 0.05 max sulfur, was subjected to thermal processing and subsequent hardness measurements.
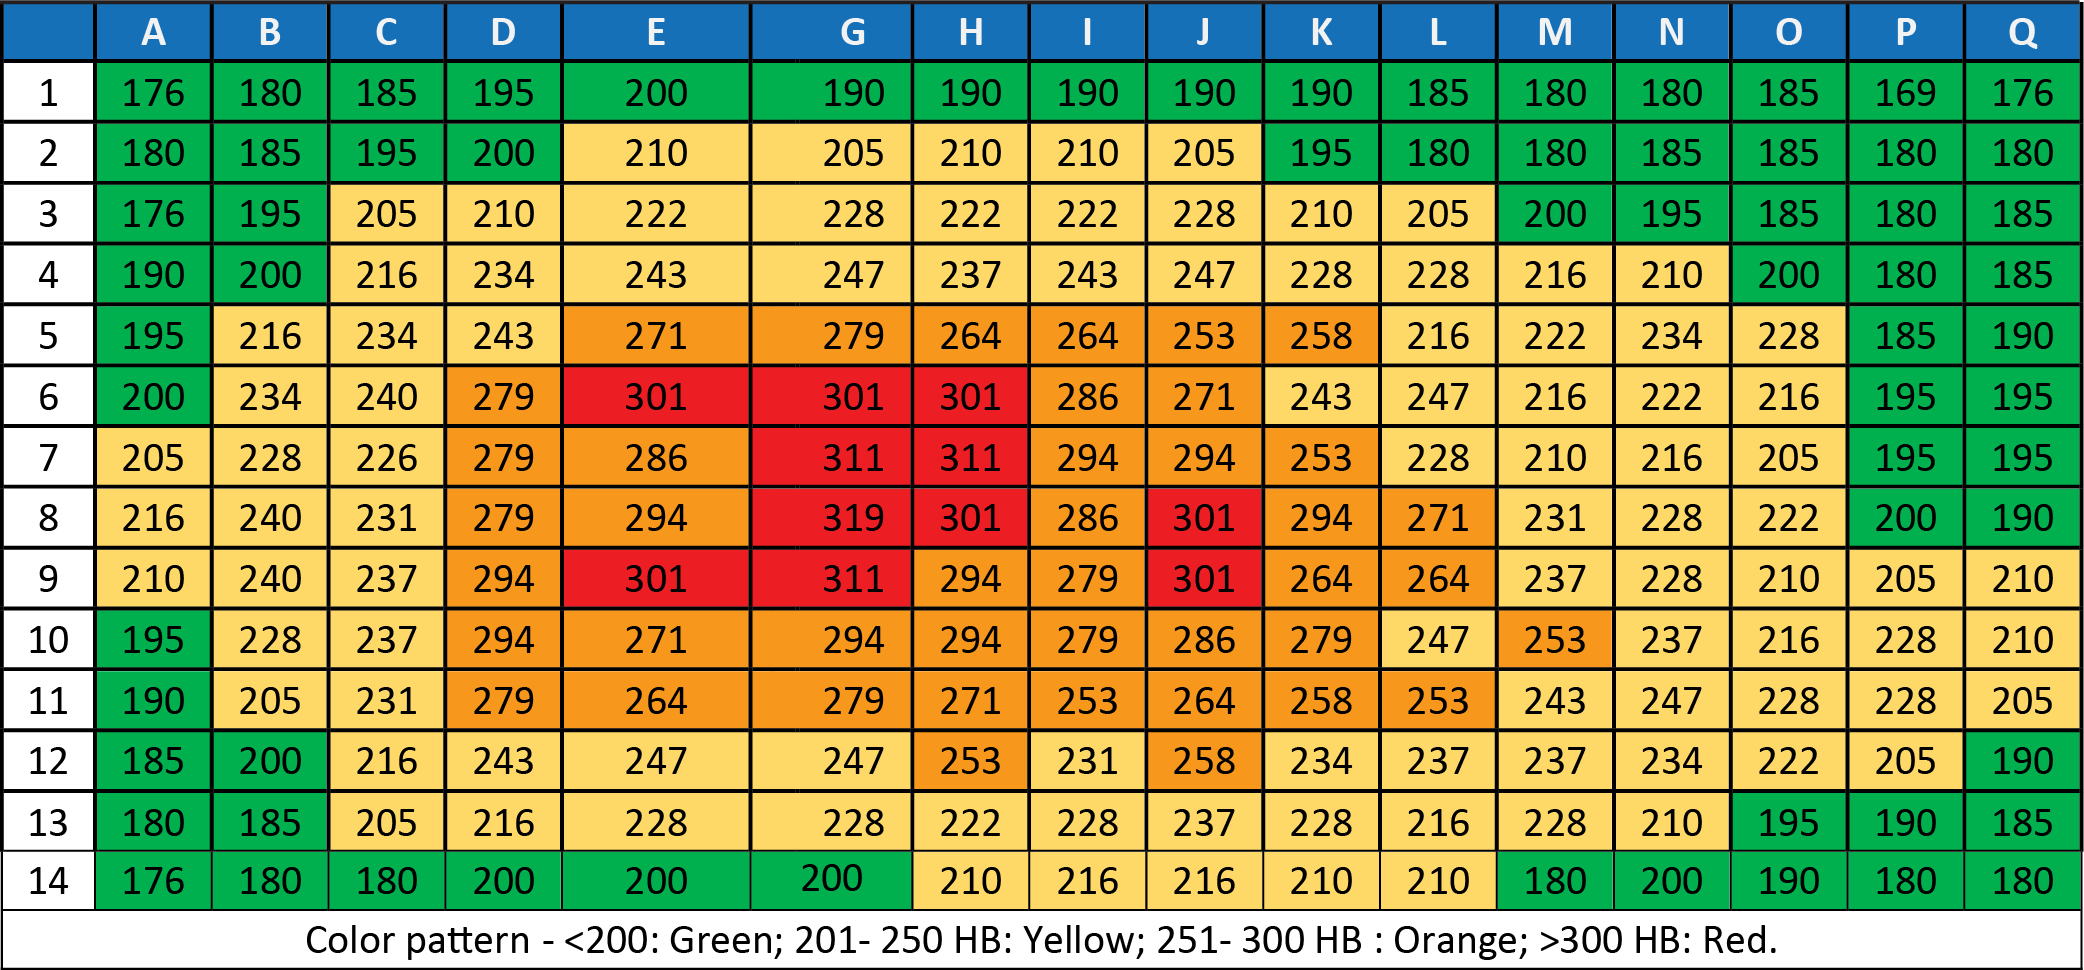
The area that underwent thermal processing and quenching displayed hardness values ranging from 147 HB (79 HRB) to 367 HB (39.5 HRC), closely mirroring the hardness range of hard spots on vintage pipes from SES’s experience which ranged between 144 HB (78 HRB) to 421 HB (45 HRC). The pattern of hardness on the created hard spot was consistent with that of a vintage pipe.

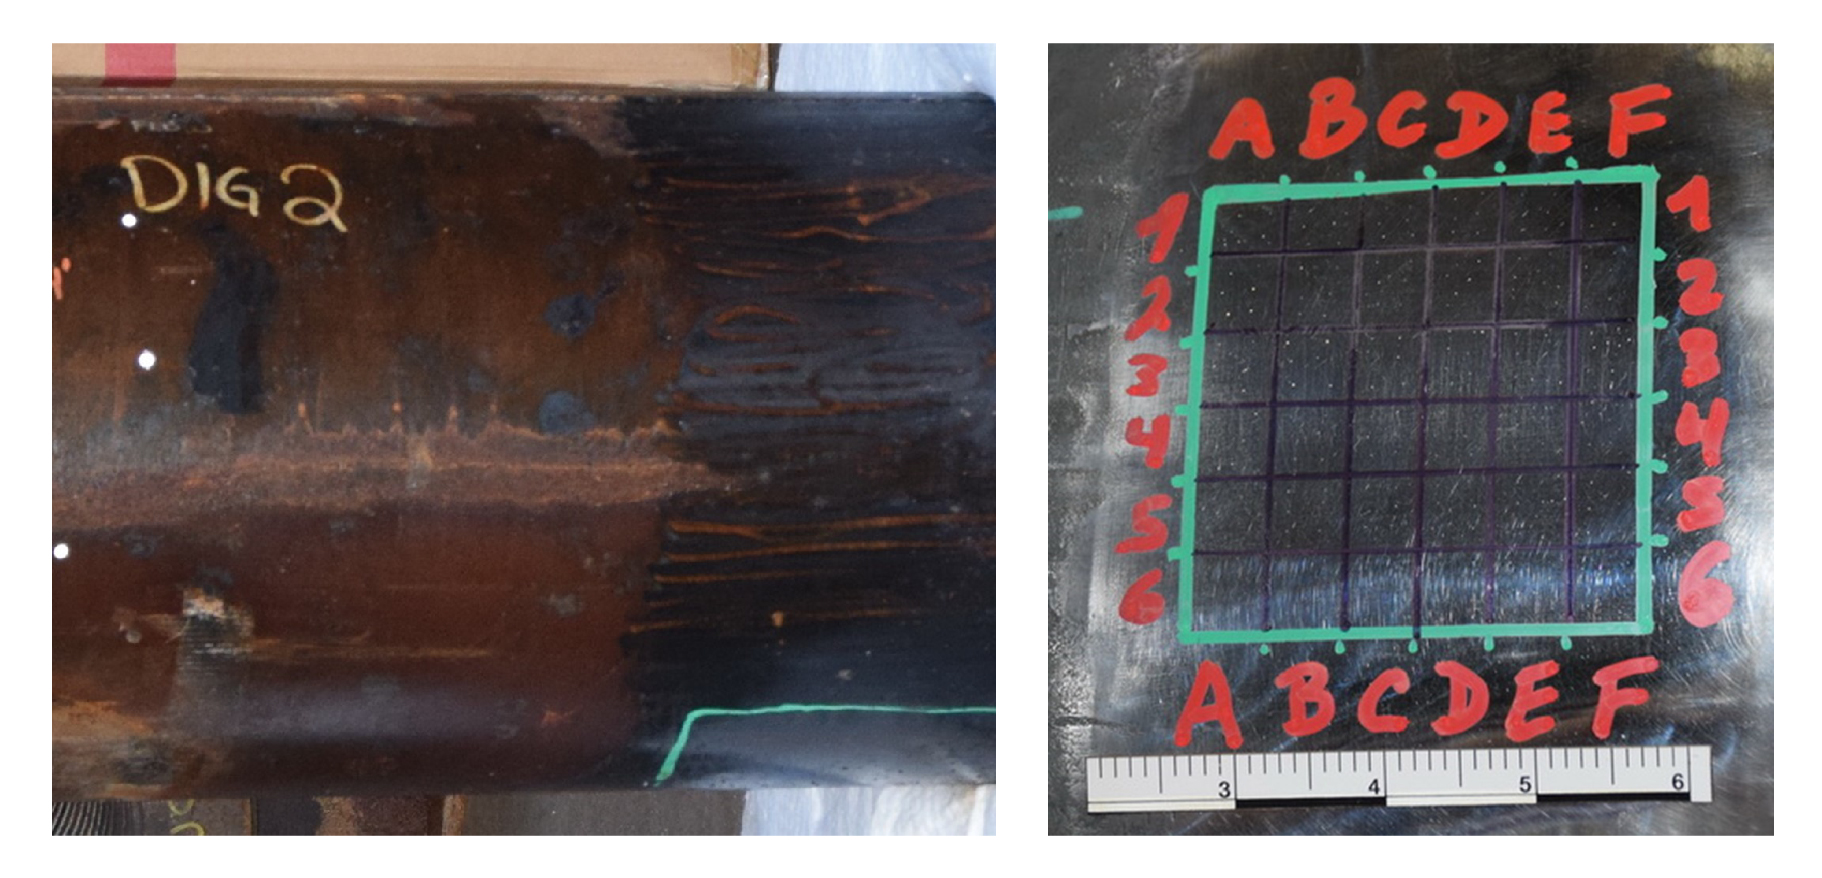
Figure 1: Left: photograph showing 18-inch diameter vintage pipe with a wall thickness of 0.320-inch that was used for trial hard spot.
Right: photograph showing hardness grid pattern on created hard spot area.
Further analysis revealed that areas with hardness greater than 327 HB (35 HRC) have an increased susceptibility to hydrogen stress cracks. However, hardness values up to 421 HB (45 HRC) are achievable in a laboratory setup using a high quench rate.
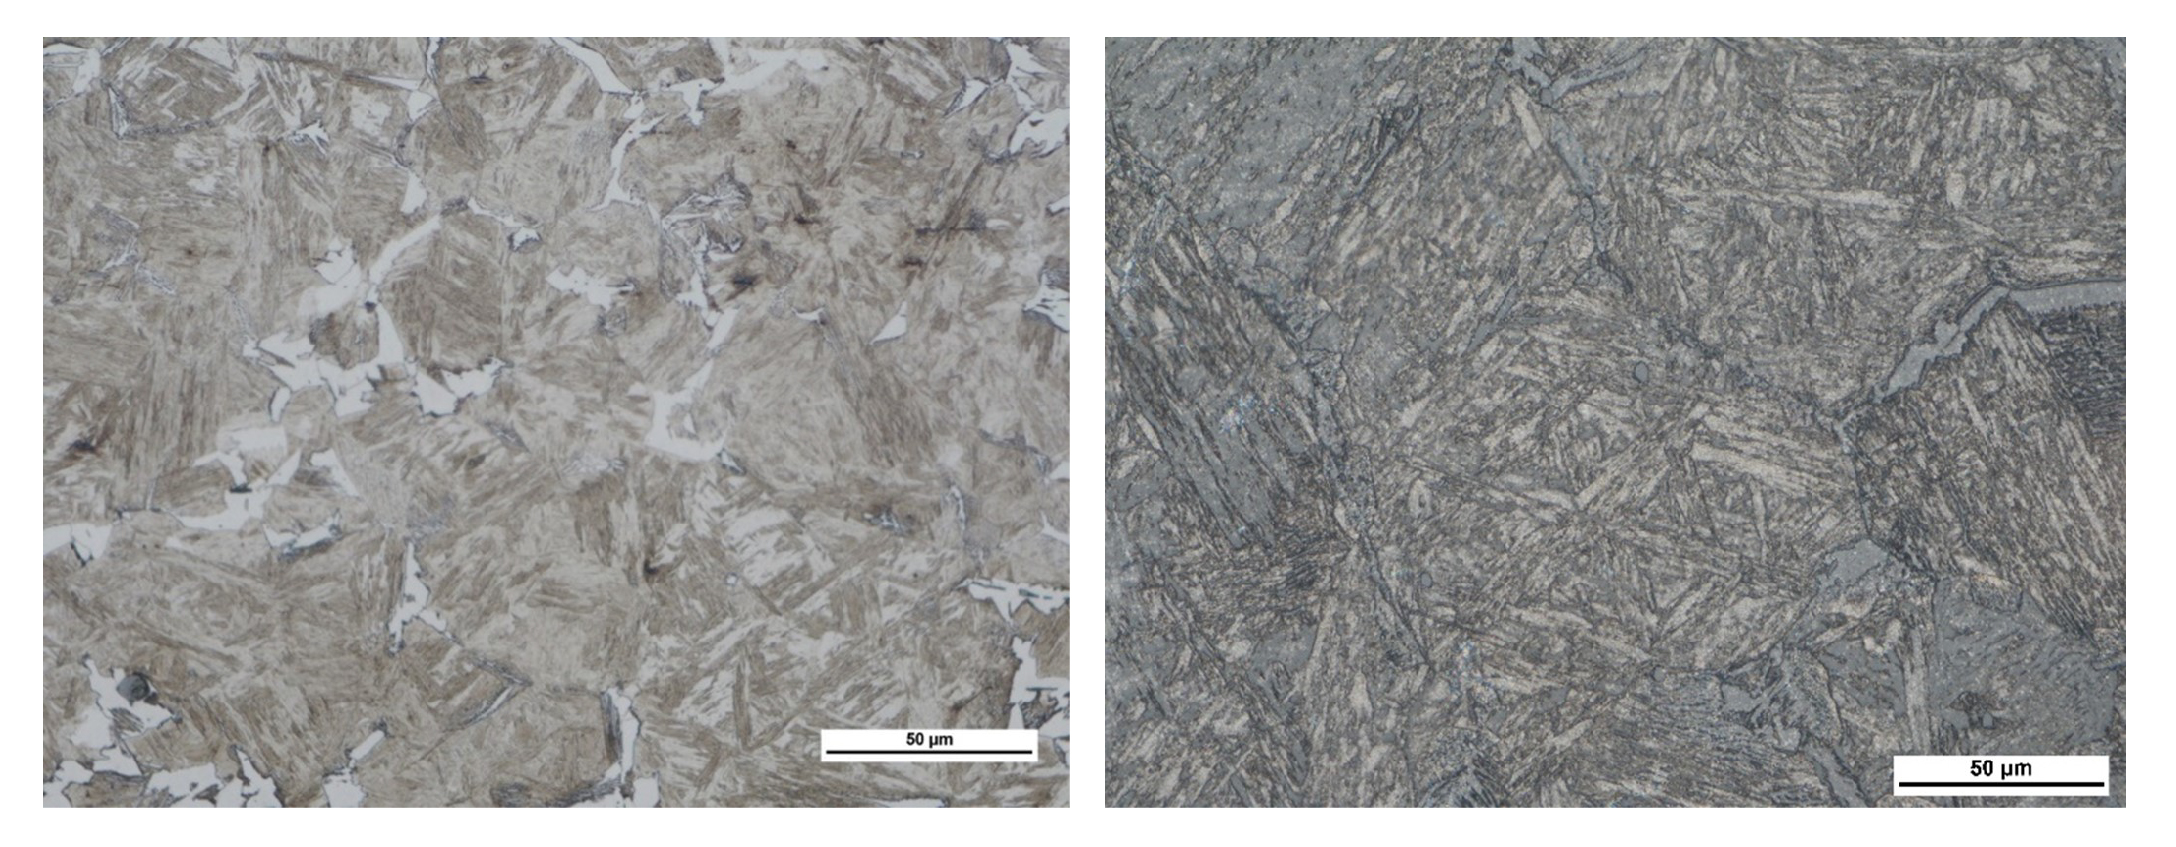
SES also performed metallographic replication to document the microstructure of the hard spot. The replica microstructure of the trial test hard spot matched the microstructure of hard spots on a vintage pipe—both exhibiting similar martensitic structures.

Table 1: Average (6 readings) OD Brinell Hardness of SES Crated Hard Spot.

Table 2: Average (3 readings) OD Brinell Hardness of Hard Spot on a Vintage Pipe.
Through this groundbreaking research, SES has proven its capability to create a hard spot of less than 2-inch diameter on a vintage pipe. By testing different parameters on different pipe grades, SES can create hard spots of various sizes and produce a range of hardness values akin to those on vintage pipes.
This promising development in the field of pipe inspection methods has the potential to greatly enhance our understanding of hard spots and improve the longevity and safety of vintage pipes.

Figure 2: Left: photomicrograph of a pipe that ruptured from a hydrogen stress crack originated at a hard spot of size 0.6-inch X 2.5-inch with a maximum hardness of 421 HB. Etchant: Nital. Original magnification: 500X. Right: replica microstructure of SES created hard spot of a vintage pipe with maximum hardness of 367 HB. Both microstructures are consistent with a martensitic microstructure produced from quenching.

Sri Chimbli, PE, AWS CWEng/CWI – Principal, Houston Office
Sri has over 15 years of experience in failure analysis, welding, metallurgical evaluation, manufacturing, and material selection. He has spent most of his career solving problems in the oil and gas industry supporting upstream, midstream, and downstream assets. He also has experience in heat treatment, coatings, fabrication, and non-destructive examination. He holds certifications in API 577–Welding Inspection and Metallurgy and API 571—Corrosion and Materials. He is also an AWS Certified Welding Engineer and a Certified Welding Inspector and is a Professional Metallurgical Engineer in the State of Texas.


Leave a Comment
You must Register or Login to post a comment.